Developing widgets for the Android platform involves a slightly different set of tasks than standard app development. In this series of tutorials, we will work through the process of developing a customizable analog clock widget. The clock will be based on the Android AnalogClock class and customized with your own graphics.
Tutorial Teaser
Once the clock is added to the user’s homescreen it will continuously update to display the current time. We will define the properties of the widget in XML, with a Java class extending AppWidgetProvider to manage updates. We will also allow the user to configure the widget appearance by clicking on it, with an Activity class handling user interaction. As you may have noticed, the Google Play listings for widgets often have poor ratings and comments from users who don’t realize a widget is not launched in the same way as a normal app. For this reason, and to accommodate some issues with devices running Android 4.0 (Ice Cream Sandwich), we will also include an informative launcher Activity for the widget app. We will also specify the layout and various other application resources in XML.
This tutorial series on Building a Customizable Android Analog Clock Widget is in four parts:
- Android Widget Project Setup
- Designing the Clock
- Receiving Updates and Launching
- Implementing User Configuration
Here’s a snapshot of what the end result will look like with the default display (i.e. before user customization):
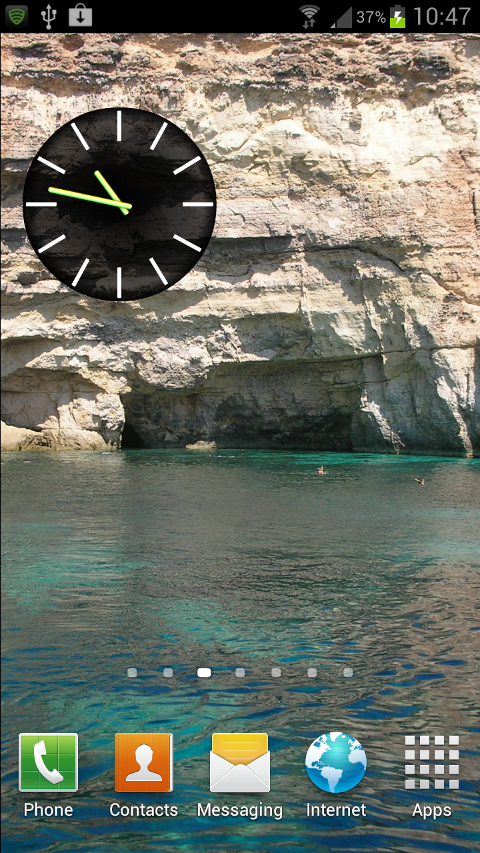
In this first part of the series, we will setup our widget project, add the necessary elements to the Manifest file, and create the XML resource file that will define the basic properties of the widget. This initial tutorial only involves a few steps, but understanding each of them is vital for learning the essentials of widget development.
Step 1: Start an Android Widget Project
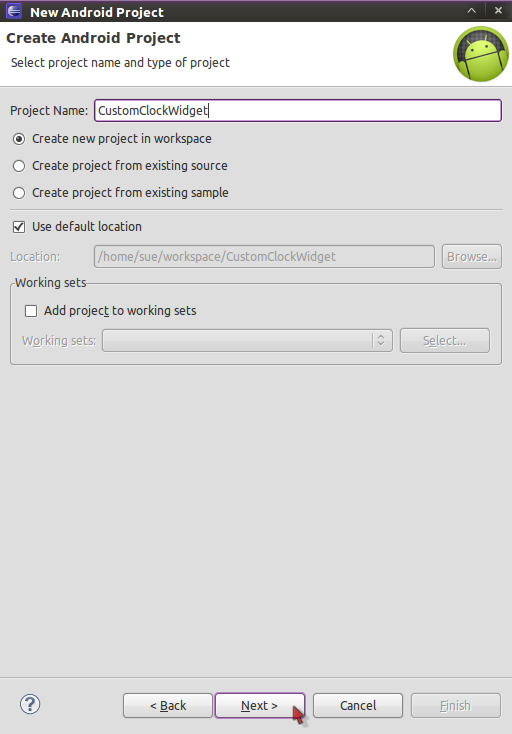
If you have only created standard Android apps in the past, creating a widget project is a little different. Start your project in Eclipse in the usual way, choosing “File,” “New” and then “Project.” Select “Android Project” from the list and then press “Next.” In the “New Android Project” window, enter the name you want to use for your widget project and click “Next.”
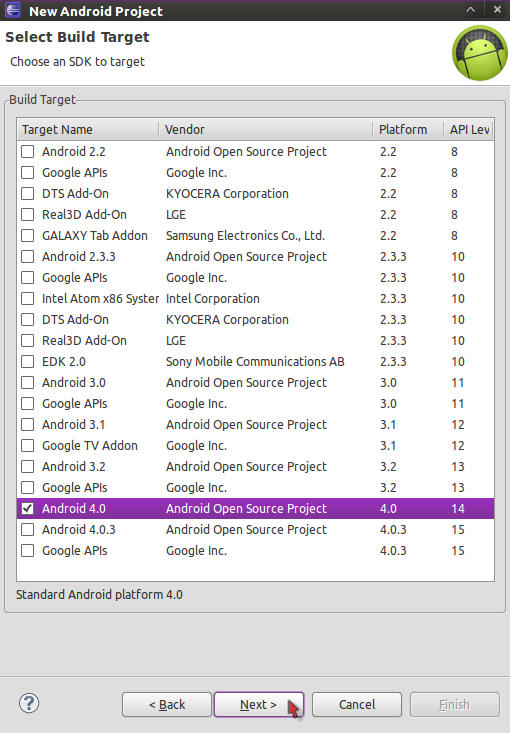
Select a build target for your app and click “Next.” We are targeting Android 4.0, which is API level 14.
In the Application Info window, enter your package name. When you develop a widget app, you do not need to create an Activity, so you can optionally uncheck the “Create Activity” section. However, we are going to include an Activity to provide information about using the widget, so we will let Eclipse create the Activity for now. You can alter the minimum SDK here or optionally modify it in the Manifest file.
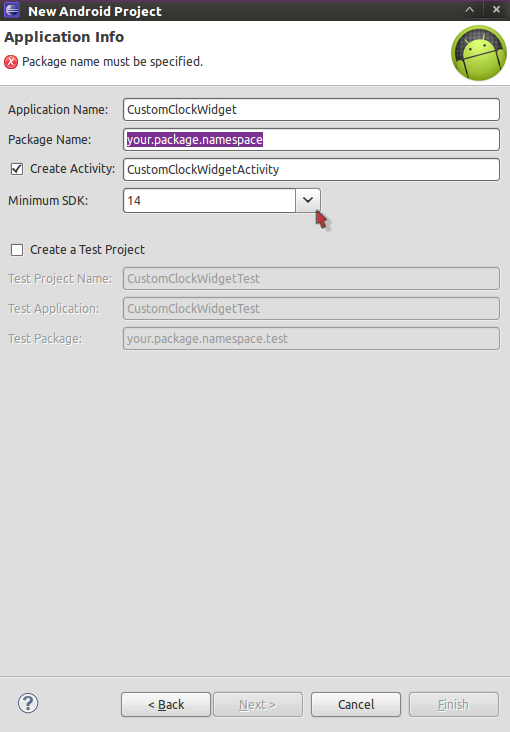
Click “Finish” and Eclipse will build your project.
Step 2: Edit the Project Manifest
Open your project Manifest file – it should be saved as “AndroidManifest.xml” in the project folder, visible within the Package Explorer. Double-click to open it, then select the “AndroidManifest.xml” tab so that you can edit the XML code directly.
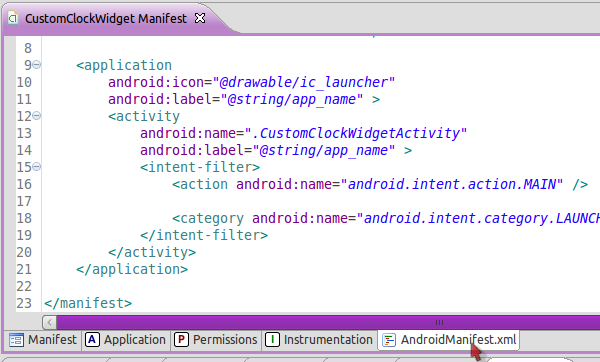
If you did not alter the minimum SDK when you created the project, but you wish to do so now, you can alter the “uses-sdk” element as in the following example:
<uses-sdk android:targetSdkVersion="14" android:minSdkVersion="8" />
As well as specifying the minimum SDK here, we also indicate the target SDK. By targeting level 14, we can make use of the automatic margin space between widgets that appears on devices running Ice Cream Sandwich.
At this point, you could edit the main Activity section of the Manifest if you did not want to use a launcher Activity. However, we are going to leave this section as it is. There are two reasons for doing so:
- When users download a widget through Google Play, they often instinctively attempt to open it, forgetting or not knowing that widget apps are not launched in the normal way but are instead added to the homescreen. When this happens, we can use the main launcher Activity to display a little informative text explaining how to add the widget – preempting any negative comments or ratings from confused users.
- There is an issue with widgets running on Android 4.0 that sometimes prevents users from being able to add new widgets to their screens. In 4.0, users add widgets by opening the device menu, selecting the Widget tab, finding the widget listed there then pressing to hold it, dropping it onto the homescreen. However, in some cases a new widget does not appear in the Widget tab – normally this is solved when the device is restarted, but it can of course cause confusion and prevent the use of your app. Providing a launch Activity prevents this issue.
Get the Full Series!
This tutorial series is available to Tuts+ Premium members only. Read a preview of this tutorial on the Tuts+ Premium web site or login to Tuts+ Premium to access the full content.
Joining Tuts+ Premium. . .
For those unfamiliar, the family of Tuts+ sites runs a premium membership service called Tuts+ Premium. For $19 per month, you gain access to exclusive premium tutorials, screencasts, and freebies from Mobiletuts+, Nettuts+, Aetuts+, Audiotuts+, Vectortuts+, and CgTuts+. You’ll learn from some of the best minds in the business. Become a premium member to access this tutorial, as well as hundreds of other advanced tutorials and screencasts.