If you’ve followed along from the previous tutorial in this session, then your development machine should now be ready for Android SDK installation. This tutorial will guide you through installation and configuration of the Android SDK for all platforms.
Step 0: Getting Started
This tutorial is part of the Mobiletuts+ session “Learn Android SDK Development From Scratch!” The target audience for this tutorial is the Java developer just about to get started learning Android who has already installed the JDK and familiarized themselves a little with Eclipse. In the next 30 – 45 minutes, you will learn how to install the Android SDK, regardless of what operating system you are using. We’ll then break out into some operating system-specific tasks to further configure the Android SDK. These steps will prepare you for the upcoming tutorials where you will start writing code and creating your own Android apps.
Step 1: Installing the Eclipse ADT Plugin
Start right where we left off with the last tutorial -within Eclipse on the Welcome screen:
Clik here to view.
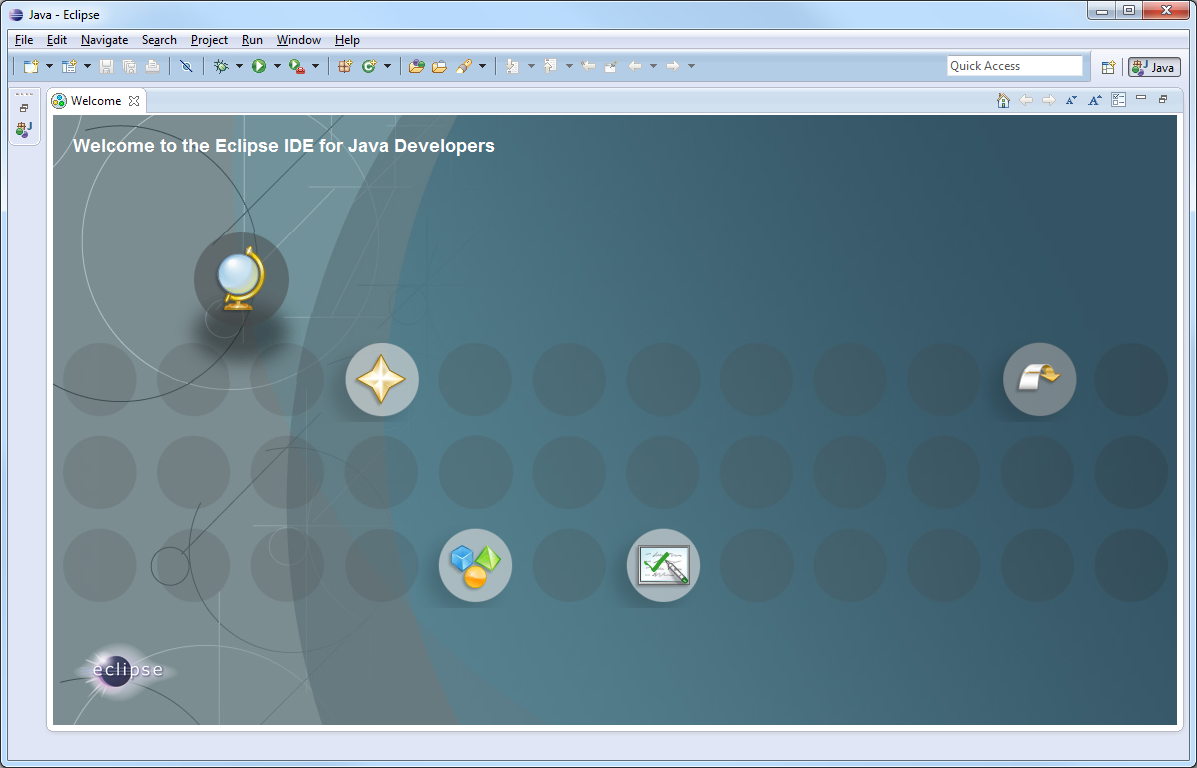
Now go to Help > Install New Software…. You will see the following dialog:
Clik here to view.
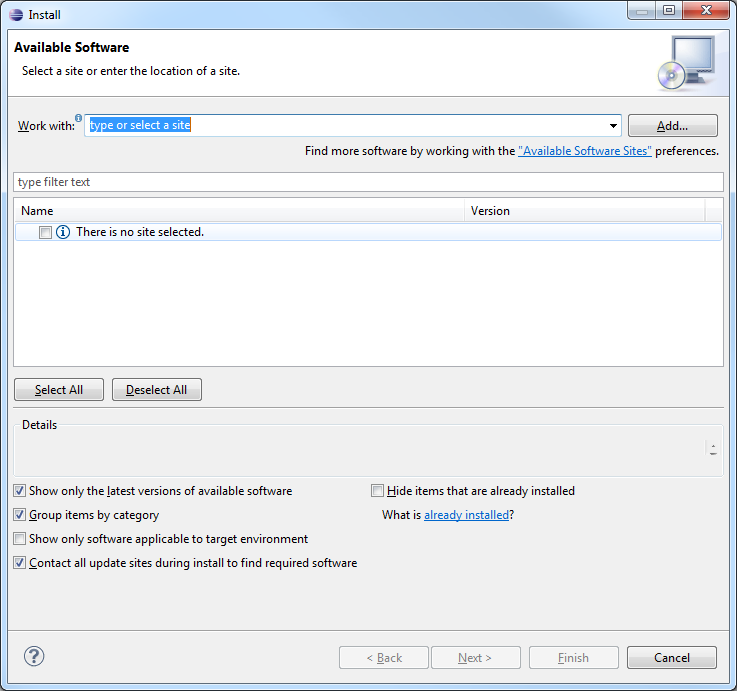
Click on the “Add…” button to add a Repository, then enter “Android SDK” for the Name field and set the URL to “http://dl-ssl.google.com/android/eclipse/” for the Location field.
Clik here to view.
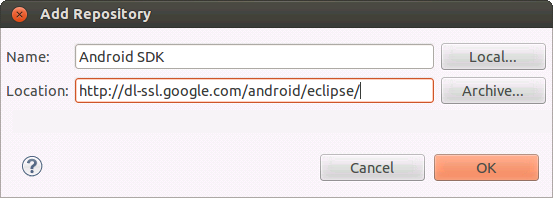
Next, press the OK button. After a moment, you’ll see a list of packages that can be installed from the Android repository. We’ve selected them all for installation and recommend you do so as well.
Clik here to view.
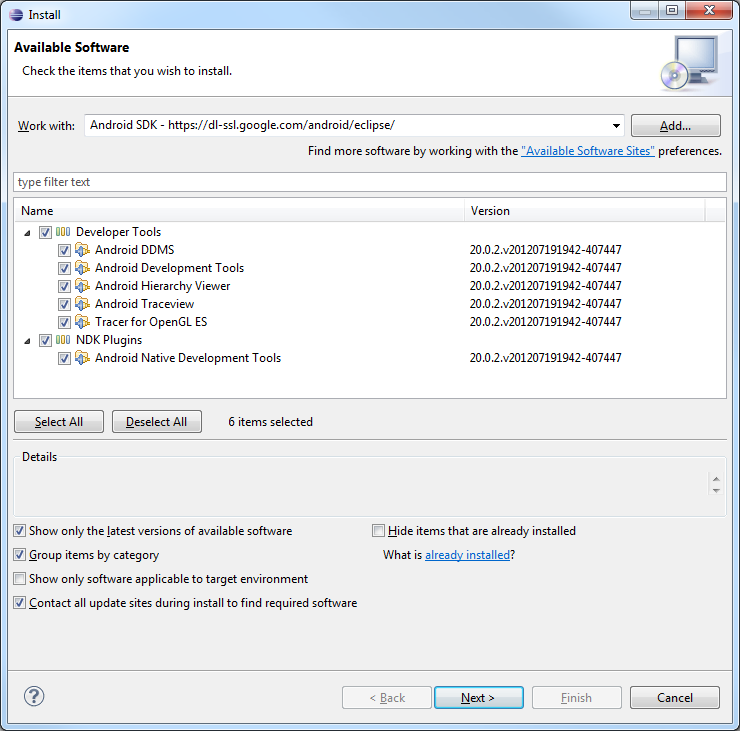
Press the Next button. You’ll be presented with a screen confirming the tools you want to install.
Clik here to view.
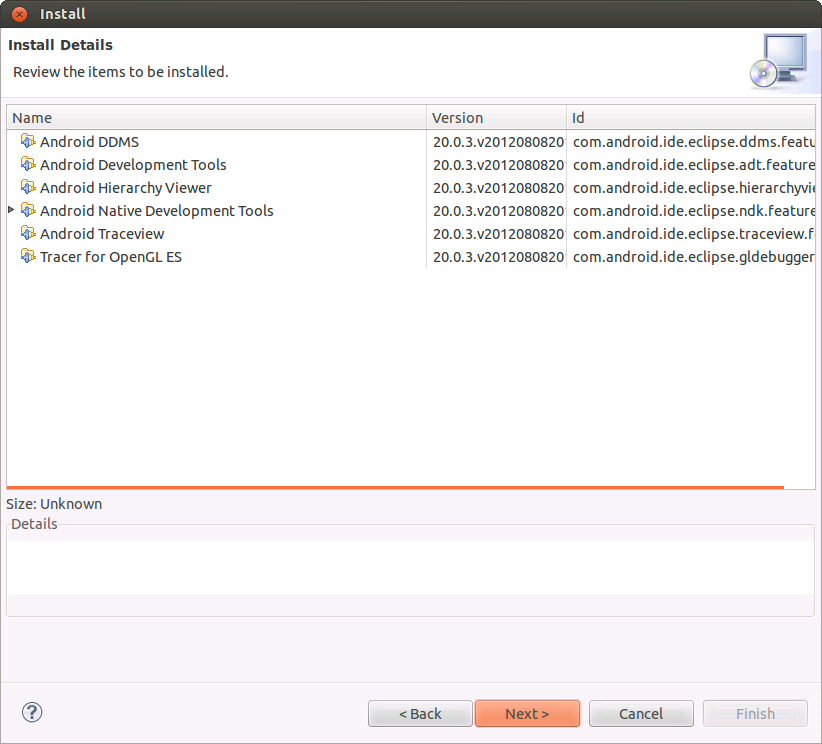
Did you select everything? If so, press the Next button to continue. The next screen provides you with a set of licenses you must agree to before you can download the tools.
Clik here to view.
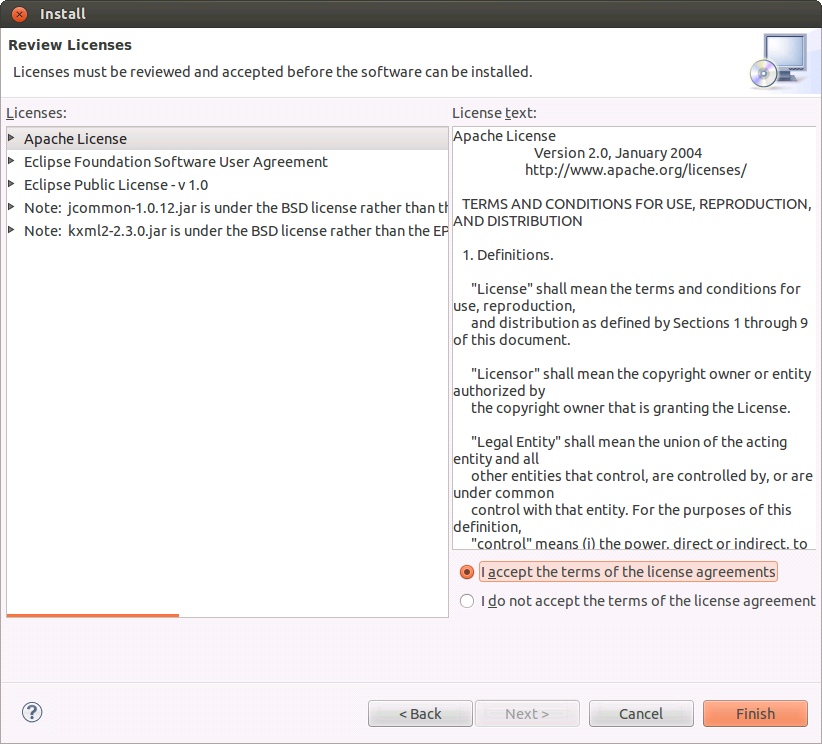
Once you have read them and you agree (or the company you’re working for agrees) to the terms, choose the “I accept the terms of the license agreements” and then press the Finish button.
At this point, the downloading of the Android tools will begin. It may take some time to complete, depending on your connection speed.
Clik here to view.
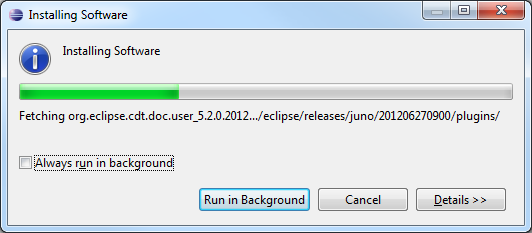
When the downloads have completed, installation will begin automatically. You’ll likely be greeted with a security warning from Eclipse. The ADT plugin, or portions of it, are not signed by the developers, but you do know where they are coming from as you entered the location yourself. Assuming you still want to proceed with installing the ADT plugin (of course you do!), press the OK button to continue installing the unsigned content.
Clik here to view.

Once installation completes, you’ll be prompted to apply the changes directly to Eclipse or to restart the program.
Clik here to view.

We highly recommend that you restart Eclipse. Don’t worry, it’s fast.
Step 2: Installing the Android SDK
When Eclipse loads up again, you’ll be presented with the following dialog welcoming you to Android Development and prompting you to install the Android SDK:
Clik here to view.
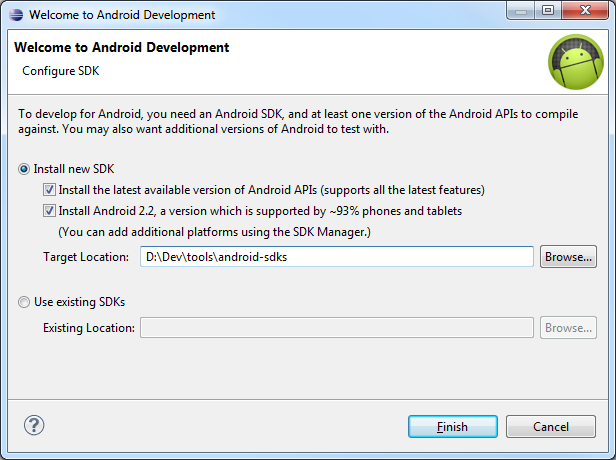
If you’ve installed the Android SDK manually in the past, this step may be a surprise. However, the Android team has greatly simplified the SDK installation through the ADT tool within Eclipse. We recommend you select to install both the latest SDK and the 2.2 SDK. You can choose where you want to install the SDKs, although the default location usually works fine.
Press the Finish button. You may now be presented with a dialog offering you the opportunity to help improve the ADT by providing usage statistics.
Clik here to view.
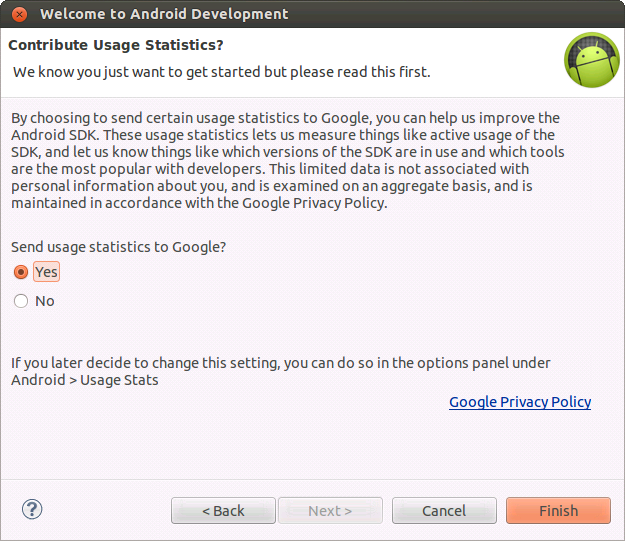
We recommend you send stats, especially since these are freely available tools and are updated frequently. They can always use improvement! Either way you choose, you’ll be asked to confirm the download of the packages.
Clik here to view.
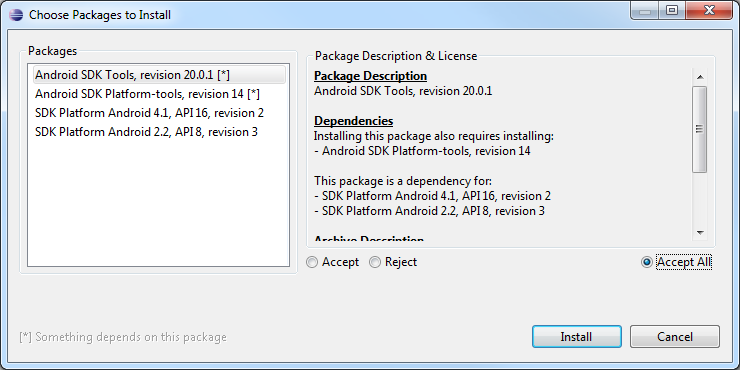
Select the Accept All radio button and then press the Install button. Downloading and installation will now proceed.
Clik here to view.

When downloading is complete, you may need (or want) to restart Eclipse again. You now have the Android SDK installed!
Step 3: Update Your Path
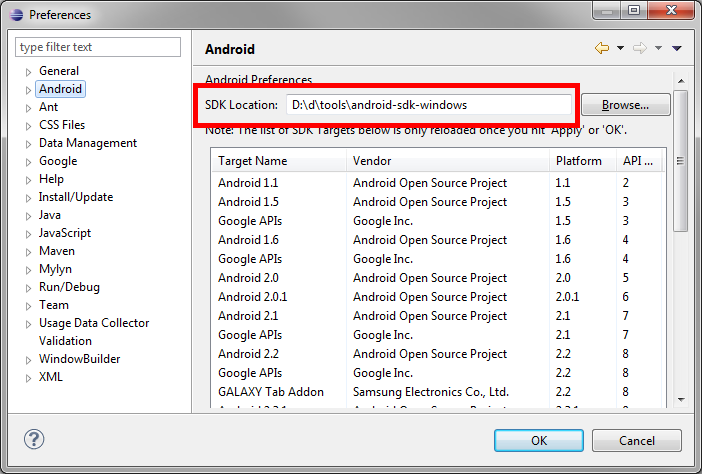
The Android SDK includes many command-line tools. It’s easiest to run them if you have the directories with these tools in them within your environment’s Path. On Linux and Mac, this usually involves editing your .profile or .bashrc file. On Windows, you edit the PATH environment variable. You’ll want to add the paths to both the tools and the platform-tools directories, wherever they happen to reside on your system. Both are at the top level of the SDK directory. Did you forget where that is already? In Eclipse, go to Preferences > Android. The SDK Location will be filled in with the path.
Clik here to view.
Conclusion
Your development machine is now ready to begin Android app development! We’ll continue with some tips and tricks to keep your system updated, talk about some of the tools you’ve installed, and then continue with what you’re waiting for: writing Android apps! Now is also a good time to wrangle up some Android devices so you can test your development efforts on actual hardware. Don’t worry, if you keep following along, you’ll be needing them soon enough!
You’re on your way to Android development. What kinds of apps are you looking forward to creating? Let us know in the comments!
About the Authors
Mobile developers Lauren Darcey and Shane Conder have coauthored several books on Android development: an in-depth programming book entitled Android Wireless Application Development (now in it’s third edition as a two-volume set), Sams Teach Yourself Android Application Development in 24 Hours, and Learning Android Application Programming for the Kindle Fire: A Hands-On Guide to Building Your First Android Application. When not writing, they spend their time developing mobile software at their company and providing consulting services. They can be reached at via email to androidwirelessdev+mt@gmail.com, via their blog at androidbook.blogspot.com, and on Twitter @androidwireless.
Need More Help Writing Android Apps? Check out our Latest Books and Resources!
Image may be NSFW.
Clik here to view. Image may be NSFW.
Clik here to view. Image may be NSFW.
Clik here to view.
Image may be NSFW.
Clik here to view.
Image may be NSFW.
Clik here to view.